iPhone 16e Back Glass Replacement
Use this guide to replace a cracked or broken back glass in your iPhone 16e. You'll need replacement adhesive for this repair.
After your repair, calibrate Apple back glass using Repair Assistant.
Some photos may be from a different model; the procedure is the same.
iPhone 16 背玻璃拆解与更换(含线圈/闪光/外麦转移
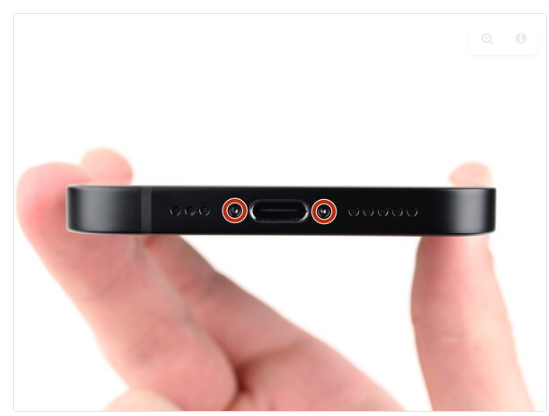
Step 1 | Remove bottom screws 步骤 1|拆底部两颗螺丝
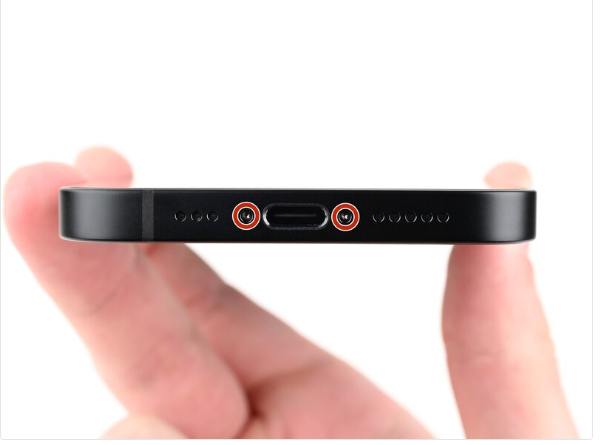
Remove the two pentalobe screws by the charging port; iPhone 16 external build differs slightly from iPhone 15.
拧下充电口两侧五角螺丝;iPhone 16 外观结构与 15 略有不同。
Step 2 | Use V8/X1 Laser Machine 步骤 2|

Preview and Make sure the laser track is on the phone
Step 3 | Select the file (iphone8-16) according to the phone 步骤 3|

Select the file (iphone8-16) according to the phone
Step 4 | Must put the iron mold on the phone 步骤 4|

Choose the protective mold according to the phone model and put it on the phone
。
Step 5 | Re 步骤 5|
Comparison of laser removal of mobile phone back covers
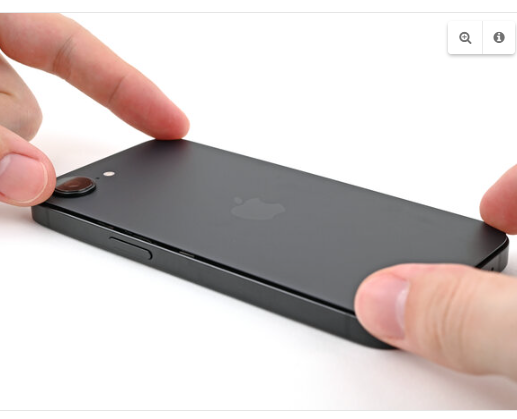
关机;拧下充电口两侧五角螺丝。
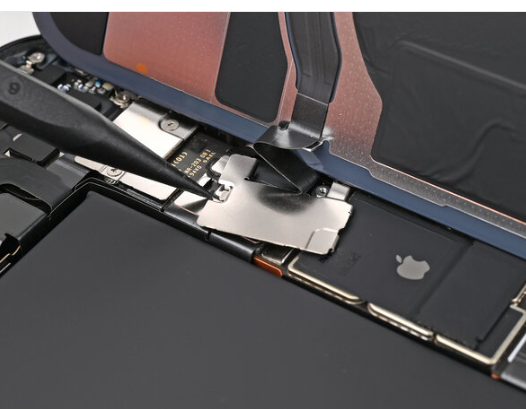
Step 6 | Remove the lower connector cover screws 步骤 6|占位防回粘;继续加热上半部
Use the provided breaking pen and prying knife to remove the rear cover glass
用拨片占位防回粘;继续加热上半部并切胶。
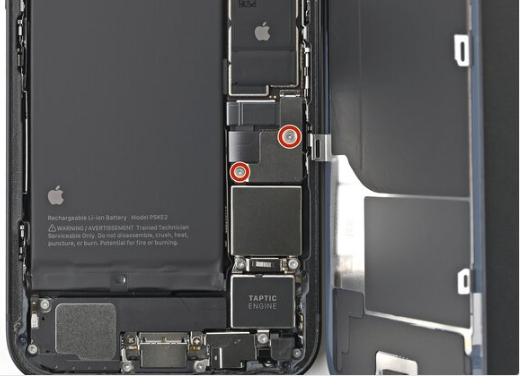
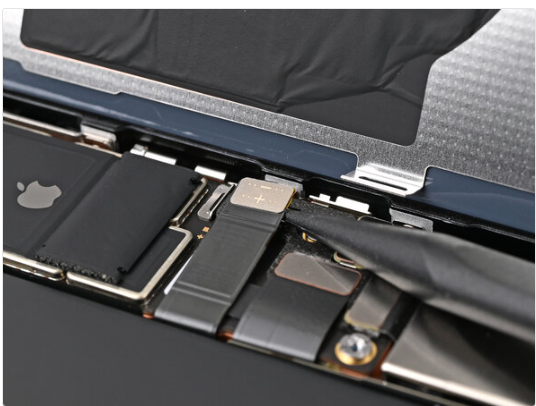
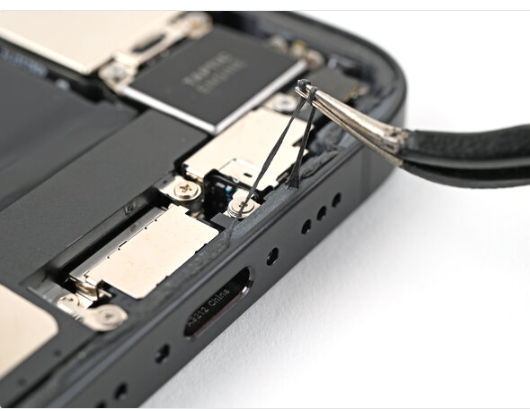
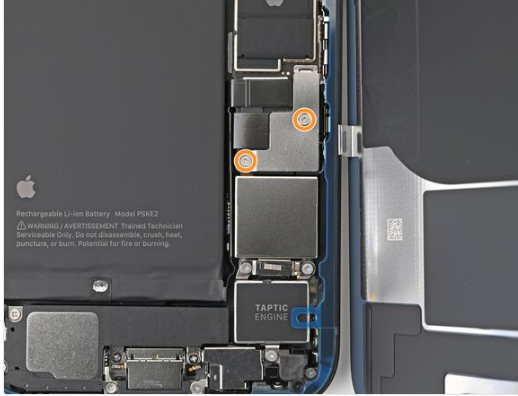
Step 7 | Remove the battery bracket 步骤 7|
Step 8 | Disconnect the battery 步骤 8|
拆
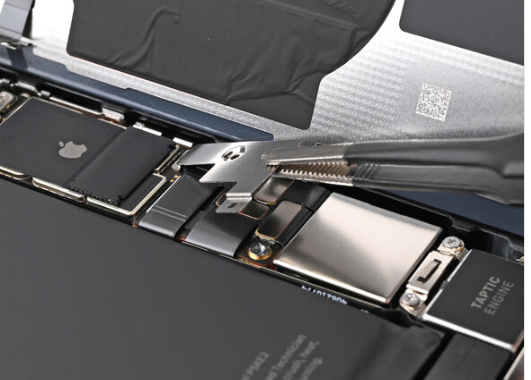
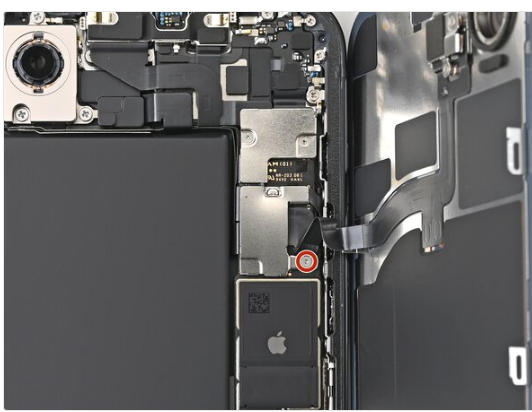
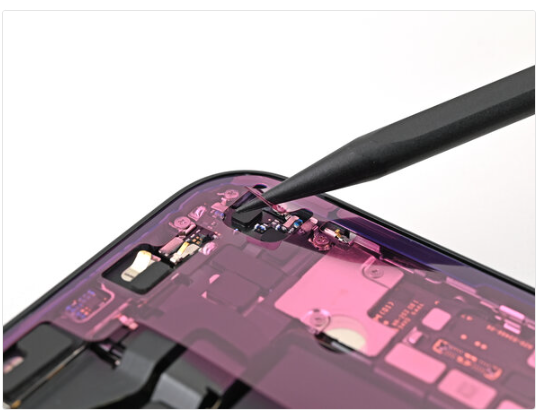
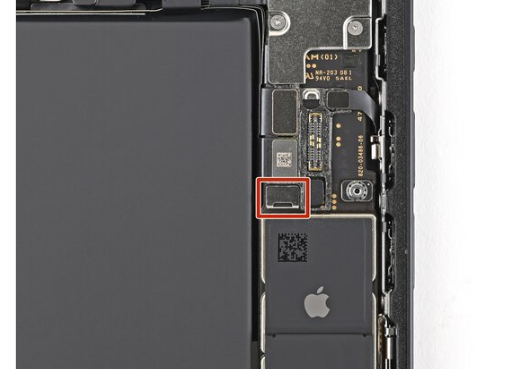
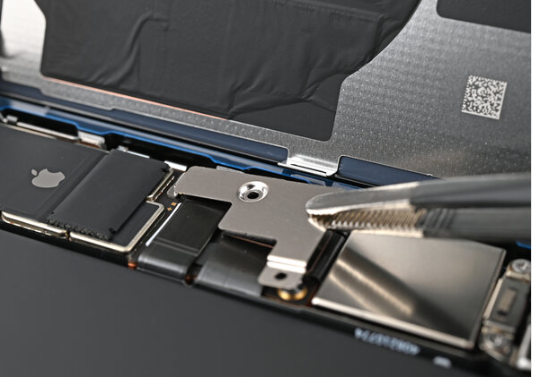
Step 9 | Remove the middle connector cover screw 步骤 9|
Step 10 | Remove the middle connector cover 步骤 10|
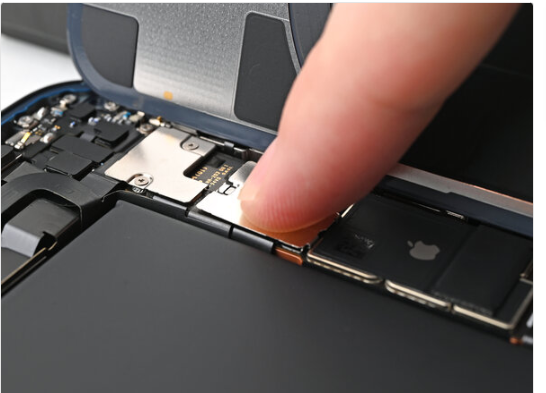
Step 11 | Disconnect the wireless charging coil 步骤 11|
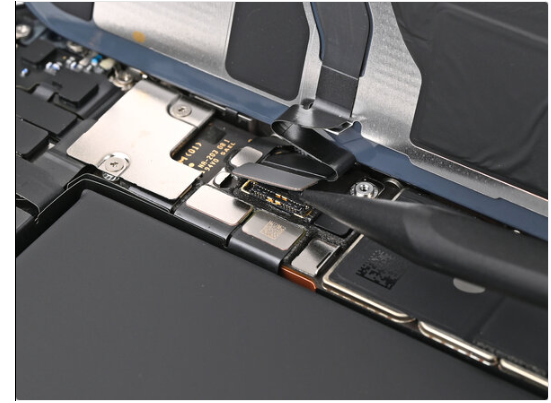
局部无胶,勿用力过猛;小传感器若损坏,可能导致无法更新或重启循环。
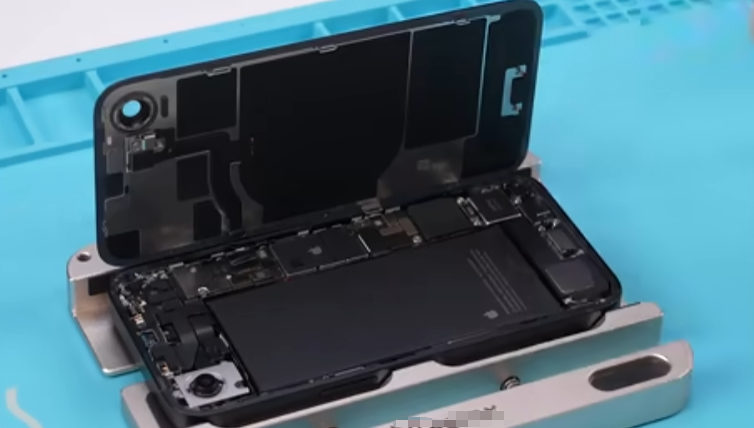
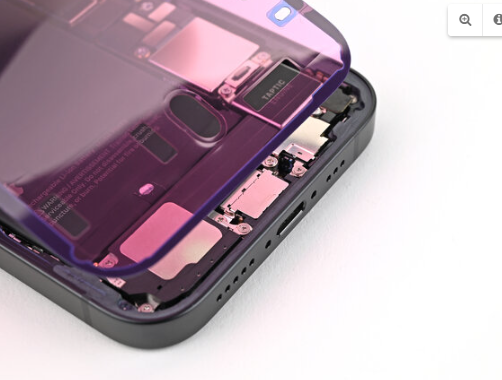
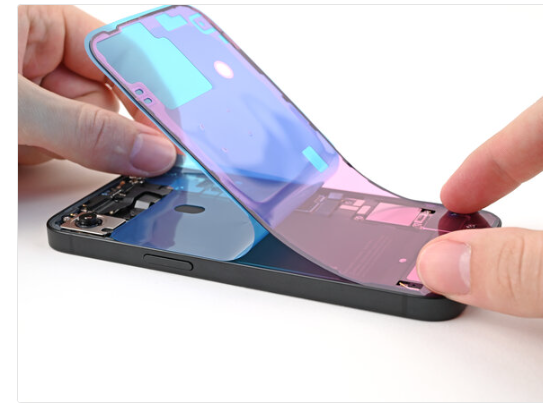
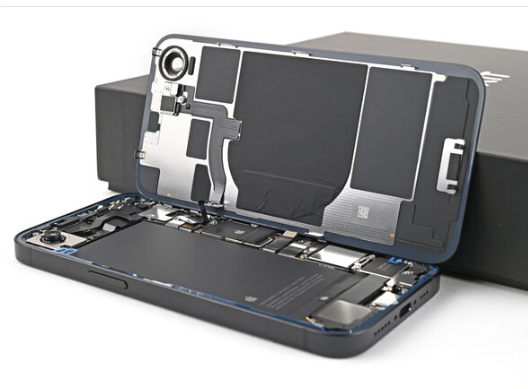
Step 12 | Remove the back glass 步骤 12|
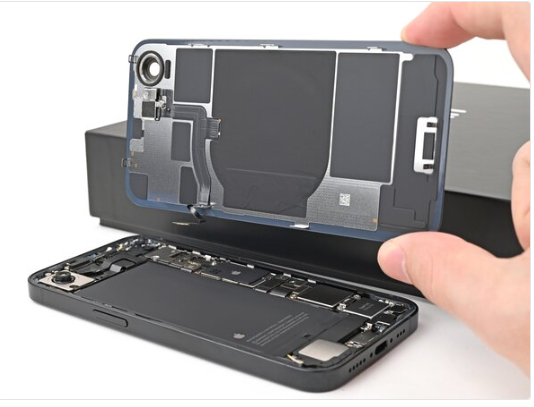
Lift the back glass off the frame and remove it.
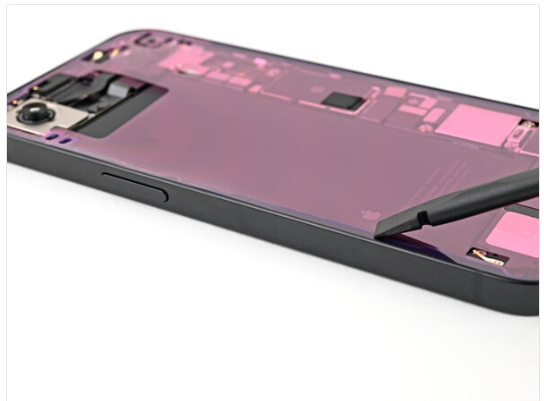
Step 13 | Remove the residual frame adhesive 步骤 13|
Step 14 | Orient the adhesive 步骤 14|
。
Step 15 | Apply the adhesive 步骤 15|
Step 16 | Continue peeling the back liner off the adhesive while pressing the adhesive into place along the edges of the iPhone's frame. 步骤 16|
Step 17 | Press the adhesive into place 步骤 17|
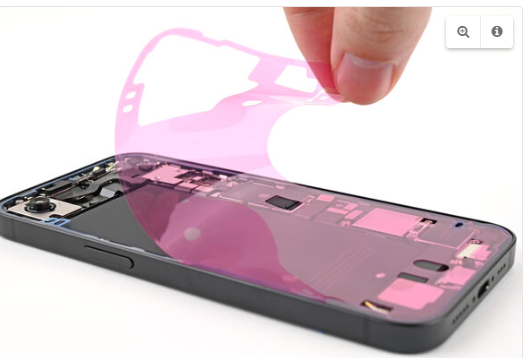
Step 18 | Use the tip of a spudger to lift up the pull tab on the top right corner of the pink adhesive liner until you can grip it with your fingers. 步骤 18|
.
Step 19 | Use the pull tab to peel the pink liner off the frame and expose the secondary blue liners. 步骤 19|
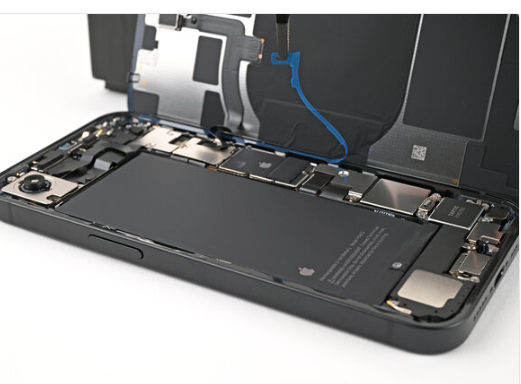
Step 20 | Connect the press connectors 步骤 20|
.
Step 21 | Place the middle connector cover 步骤 21|
Power off the device.
Step 22 | 步骤 22|
- Use your finger to press the cover down on the logic board.
- While pressing it down, slide the cover upward so both metal clips slot into their spots in the logic board.
Step 23 | Place the lower connector cover 步骤 23|
Step 24 | Install the cover screws 步骤 24|
Step 25 | Remove the final liners 步骤 25|
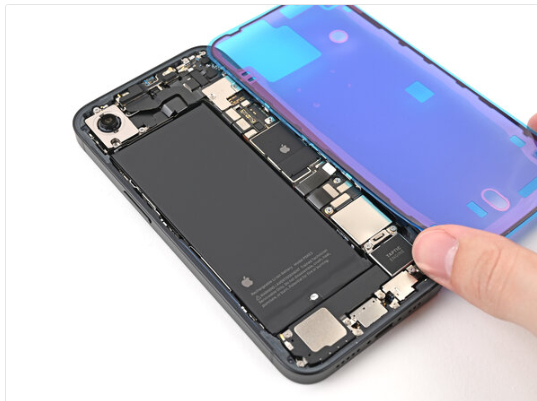
Step 26 | Place the back glass 步骤 26|
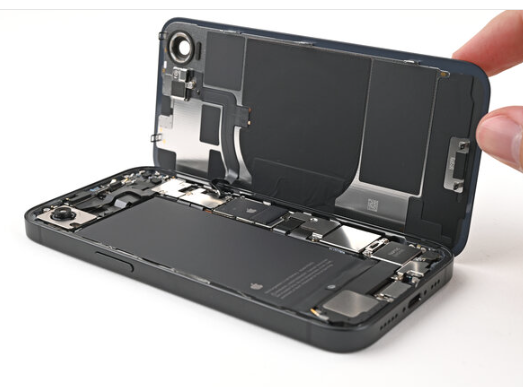
Step 27 | 步骤 27|
- Lay the back glass straight down onto the frame and press until the clips engage.
- Press around the perimeter of the back glass to engage all clips.
Step 28 | Use JYBY2 Phone Pressure Holding Machine 步骤 28|
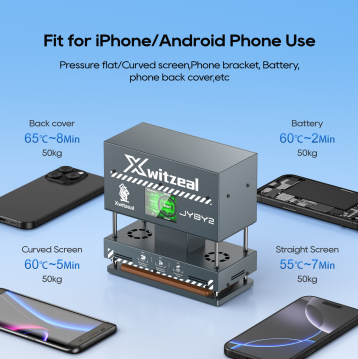
Use machine to recover the iphone air tightness faster
Step 29 | Install the pentalobe screws 步骤 29| 00:00