iPhone 16e Screen Replacement — Coil/Flash/Ext Mic Transfer iPhone 16 背玻璃拆解与更换(含线圈/闪光/外麦转移)
Based on the narrated teardown: heat from bottom, shallow picks, transfer wireless coil, flashlight and external mic, reassembly and test. 依据视频解说:自底部加热、浅插拨片,转移无线充线圈/闪光灯/外置麦克风,回装与测试。
Step 1 | Remove bottom screws 步骤 1|拆底部两颗螺丝 00:00
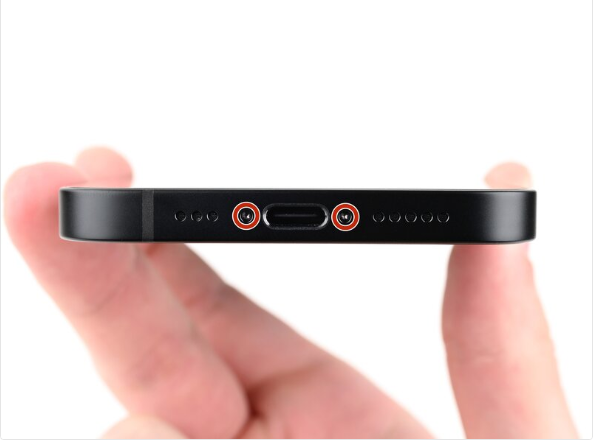
Ensure that your iPhone is turned off. If it cannot be turned off, follow the alternative procedure first.
Remove the two pentalobe screws by the charging port; the iPhone 16 external build differs slightly from the iPhone 15.
拧下充电口两侧五角螺丝;iPhone 16 外观结构与 15 略有不同。
Step 2 | Put the phone on the machine 步骤 2|
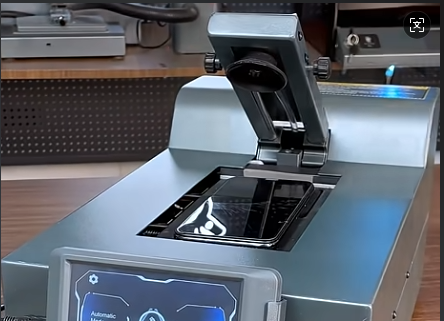
If the mobile phone screen is broken, apply a tempered glass screen protector before placing it in the machine.
If the mobile phone is not broken, place it directly in the machine.
Step 3 | Set temperature and time 步骤 3|
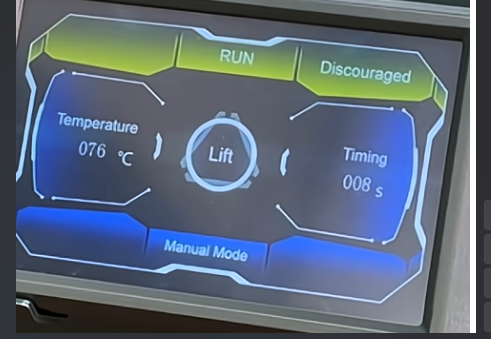
Choose the Automatic Mode, and set the temperature and time
用可控温热风枪,自底部加热约 50 秒:温度高档、风量约 50%。
Step 4 | Upon reaching the desired temperature, the machine automatically raises the screen. 步骤 4|
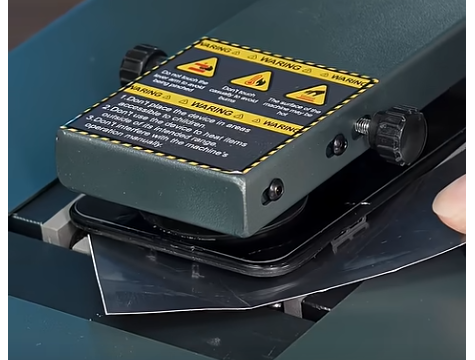
When the temperature is reached, the machine will automatically lift the mobile phone screen. At this point, simply place an object that can separate the screen in the middle of the raised screen.
Step 5 | After completion, automatically release the mobile phone. 步骤 5|
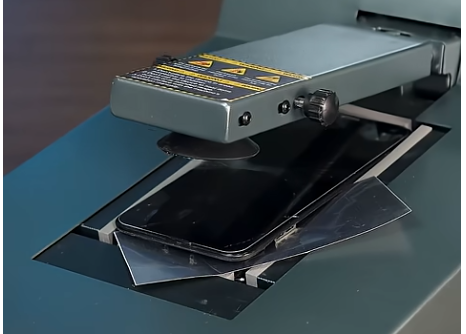
Click ‘Finish’ and the machine will automatically release the suction cup from the mobile phone.
热风枪保持移动,避免烫伤;拨片始终浅插。
Step 6 | Remove the mobile phone. 步骤 6|
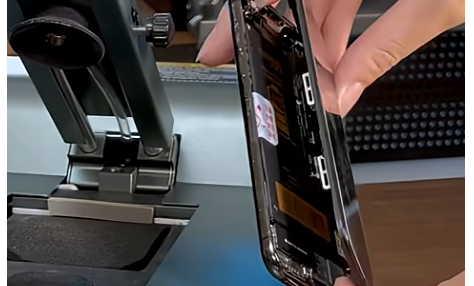
The mobile phone screen has been successfully removed.
Step 7 | Remove the cover screws 步骤 7|
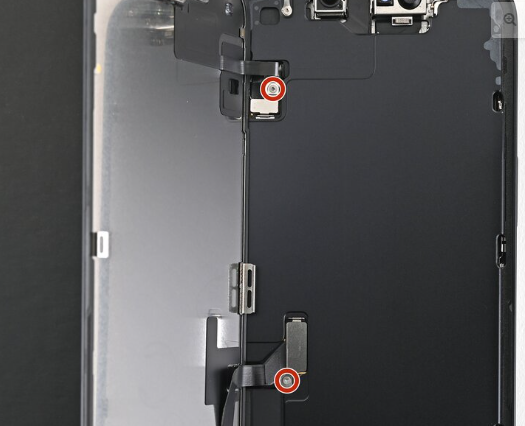
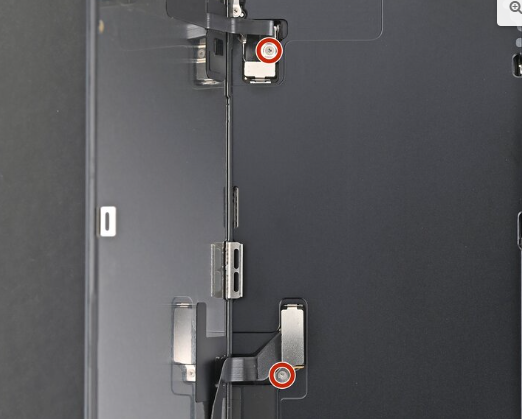
Use a tri-point Y000 screwdriver to remove the two 0.9 mm‑long screws securing the front sensor connector and screen connector covers.
Step 8 | Remove the covers 步骤 8|
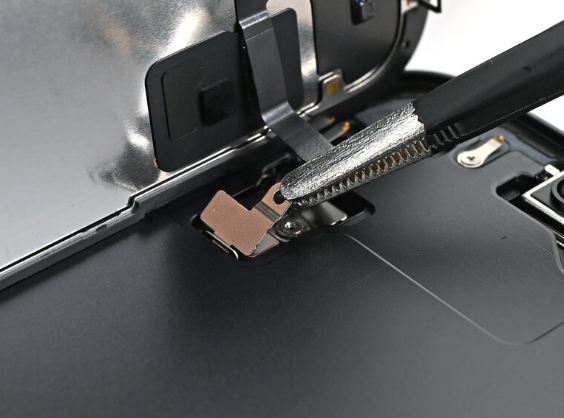
Lift the cover out of its slot and remove it.
Step 9 | 步骤 9|
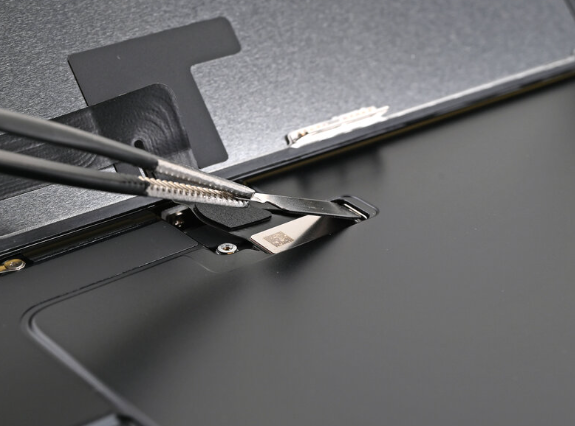
Lift the cover out of its slot and remove it.
Step 10 | Disconnect the screen 步骤 10|
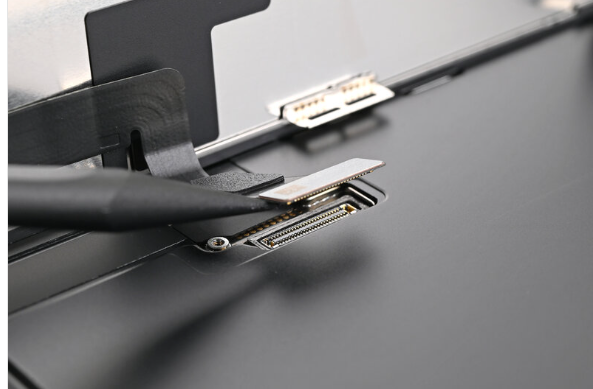
Repeat for the front sensor press connector.
Step 11 | Remove the screen 步骤 11|
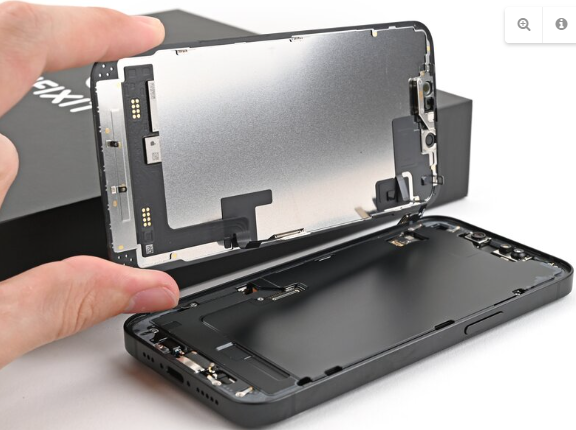
Lift the screen off the frame and remove it.
Step 12 | Remove the old adhesive 步骤 12|
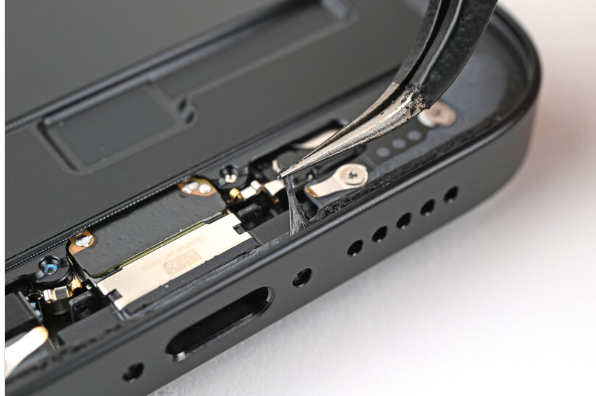
Use tweezers to remove the adhesive around the perimeter of the frame
You may need to bunch up the adhesive with the point of a spudger before gripping it with tweezers.
Use a coffee filter or a lint‑free cloth and high‑concentration isopropyl alcohol (>%90) to clean off any adhesive residue.
持续加热;慢慢揭除塑料/石墨覆盖,释放线圈。
Step 13 | Orient the adhesive 步骤 13|
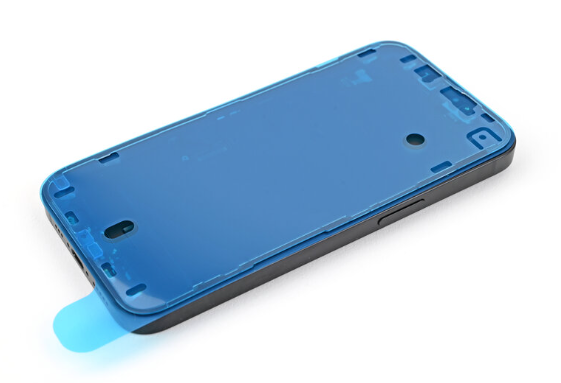
ay the adhesive on top of the phone and use features like cutouts for spring contacts and the front‑facing camera to make sure the adhesive is oriented correctly.
Step 14 | Apply the adhesive 步骤 14|
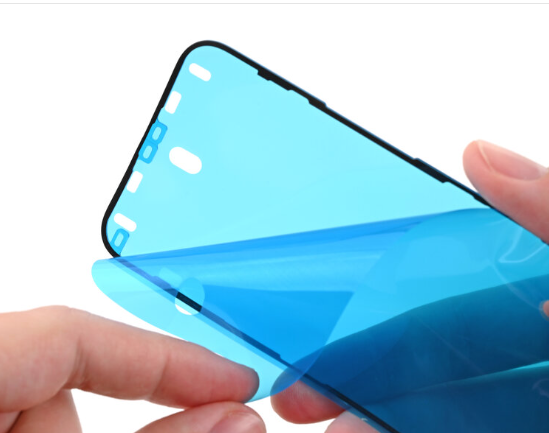
Once the adhesive is pressed into place, you can't reposition it—you'll have to remove it and start over with new adhesive.
Step 15 | 步骤 15|压片先卡紧,再上螺丝 07:37
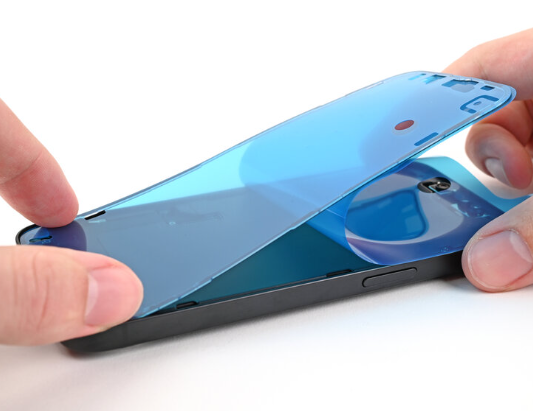
Continue peeling the back liner off the adhesive while pressing the adhesive into place along the edges of the iPhone's frame.
Step 16 | Press the adhesive into place 步骤 16|
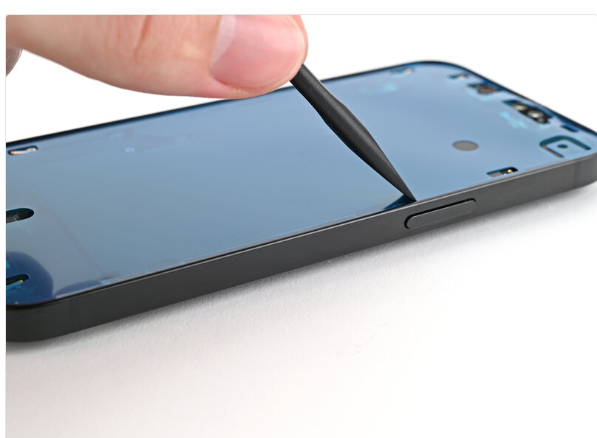
And then use the pull tab to peel the blue liner off the frame.
Step 17 | Connect the screen 步骤 17|
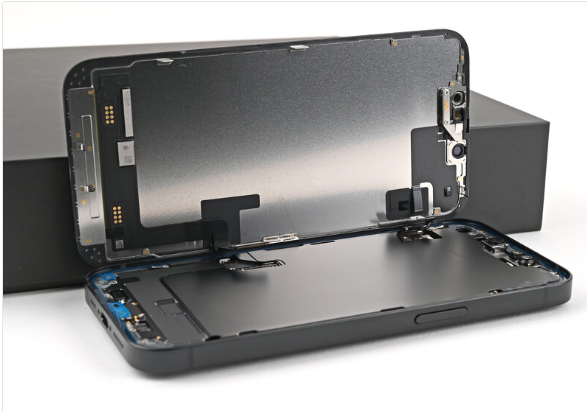
Insert the top of the screen connector cover into its slot in the frame and lay it over the press connector.
Angle the front sensor connector cover at a 90-degree angle and insert it into its slot in the frame.
Lay the cover over the press connector.
Step 18 | Install the cover screws 步骤 18|拆底部两颗
Step 19 | 步骤 19|
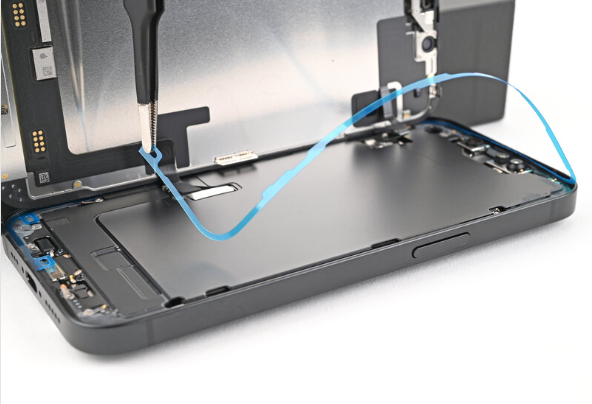
- Use tweezers or your fingers to grip the blue pull tab and remove the liner along the right edge.
- Without letting the screen touch the adhesive, hold the screen over the phone and remove the other two liners.
Step 20 | Place the screen 步骤 20|
Step 21 | 步骤 21|
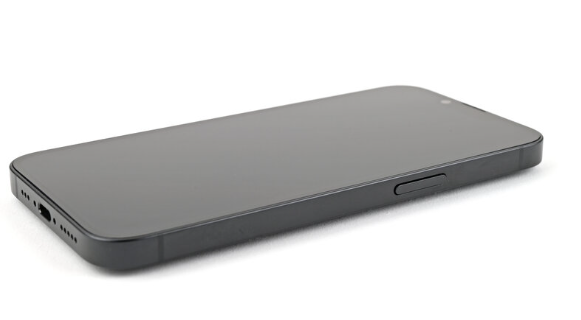
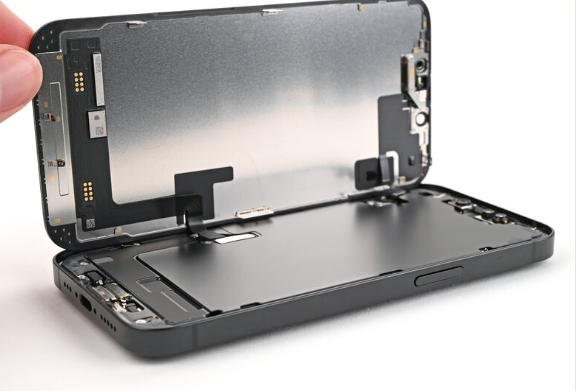
- Lay the screen down onto the frame and press until the clips engage.
- Press around the perimeter of the screen to engage all clips.
Step 22 | Place the mobile phone in the machine. 步骤 22|
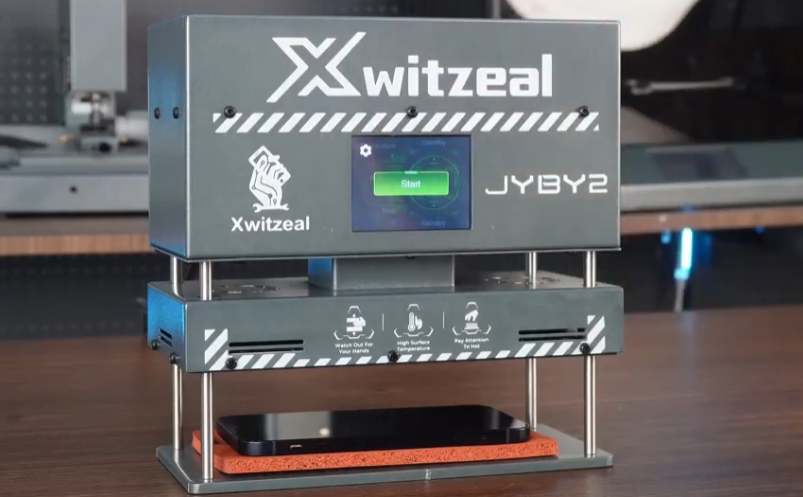
Put the mould together
关机;拧下充电口两侧五角螺丝。
Step 23 | Setting Time, Temperature and pressure 步骤 23|
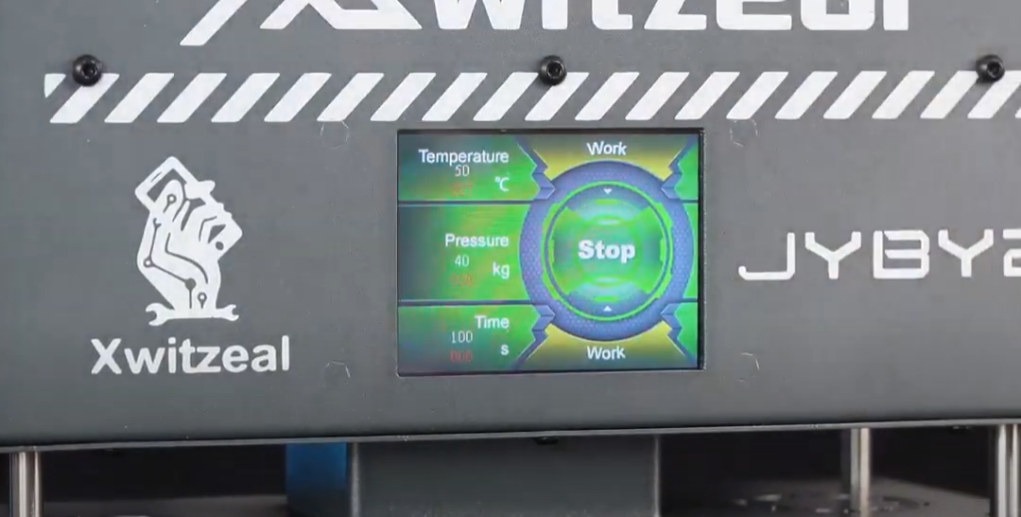
Step 24 | Automatic pressure column pressing 步骤 24|
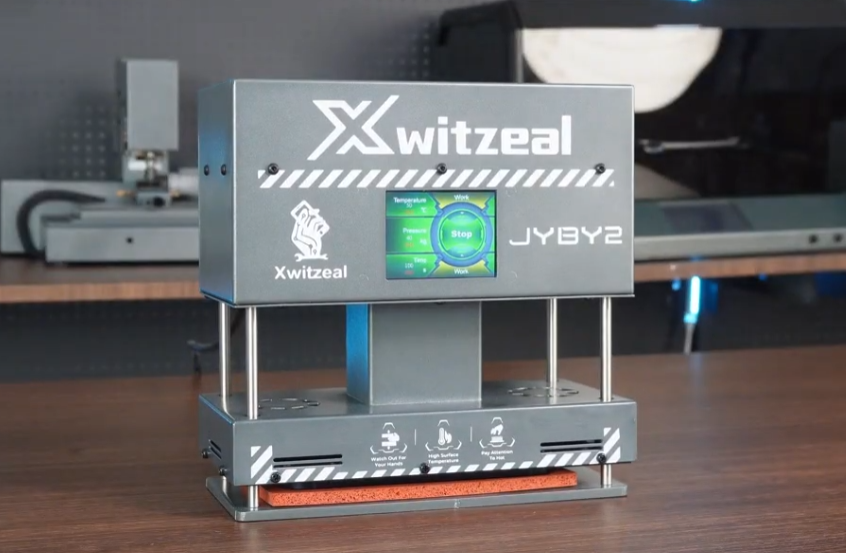
Once the temperature and time are reached, the machine will automatically release the pressure column, at which point you can remove your mobile phone.
Step 25 | Install the pentalobe screws 步骤 25|

Use a P2 pentalobe screwdriver to install the two 7.8 mm‑long screws on either side of the charging port.
